Leaderboard


Popular Content
Showing content with the highest reputation on 03/05/17 in all areas
-
That advice applied when you started preclear from a telnet/ssh session - not when started via the plugin.2 points
-
Overview: Support for Docker image arch-delugevpn in the binhex repo. Application: Deluge - http://deluge-torrent.org/ Docker Hub: https://hub.docker.com/r/binhex/arch-delugevpn/ GitHub: https://github.com/binhex/arch-delugevpn Documentation: https://github.com/binhex/documentation If you appreciate my work, then please consider buying me a beer For other Docker support threads and requests, news and Docker template support for the binhex repository please use the "General" thread here1 point
-
cache_dirs is a script to attempt to keep directory entries in memory to prevent disks from spinning up just to get a directory listing. The Linux kernel keeps the most recently accessed disk buffers and directories in memory, and flushes out the least recently accessed entries. If we can 'trick' the kernel into keeping our directory entries in that memory cache, then directory scans will find what it is looking for is already in memory, and not need to access the physical disk to get it. As a result, since the physical disk is not accessed, linux will (after the defined time-out delay) let the physical drives spin down, and save on power costs, plus remove the drives as heat sources. This is especially useful when media files are spread across multiple drives, and a media player begins to scan for a particular media file to play. You want the scan to look at all of the relevant directories, but only spin up the one drive containing the desired media file. Since the cache management decision process tries to keep the most recently accessed disk buffers and directory entries, we need to 'trick' it by constantly accessing the directories of the folders we want to keep in the cache, so that they will always appear to be the most recently accessed. I've developed, with the help of lots of suggestions and feedback, an easily customizable script called cache_dirs to do this. it is described in the wiki here A long series of posts describing its evolution over time is here in this thread It has many possible tunable options, but most people can simply invoke it as cache_dirs -w The "-w" option will cause it to wait if unRAID is not yet started. If you have a folder or folders you wish to exclude, there is a -e option. This option can be used multiple times. To exclude a "data" and "old-stuff" directory, you would use cache_dirs -w -e "data" -e "old-stuff" Always use Quote marks around the folders you wish to exclude or include, this is especially important if the folder name contains a space or other special character that might be interpreted by the linux shell. By default, all top level folders on the disks and everything under them in sub-folders are scanned. If you only want a subset of the top -level folders scanned, you can supply an "include" list using the "-i include_dir" option. Again, it may be repeated on the command line multiple times. If using the "include" feature, only those directories included are scanned. There is no need to use an exclude as well, unless you use a wild-card for the include directory and the "include" wild-card matches more than you want cached. (The include and exclude options work on top-level folders only. They may not be used to include or exclude specific sub-folders. You can use a different option (-a) if you wish to exclude a sub-folder, as shown in this post ) For example, let's say you have folders like this: Movies-Comedy-Bad Movies-Comedy-Good Movies-Chick-Flicks-Good Movies-Chick-Flicks-Bad Movies-Adventure-Good Movies-Adventure-Bad Movies-Drama-Good Movies-Drama-Bad Movies-Kids-Good Movies-Kids-Bad Movies-Junk-Good Movies-Junk-Bad Data1 Data2 Data3 ... You could use an include rule like this -i "Movies*" and an exclude rule like this in combination with it -e "*Bad" You would cache only those directories that start with "Movies" and do not have "Bad" at the end of their name. If you added one more exclude like this: -e "*Junk*" You would not scan either of the folders with Junk in their name. Using a combination of include and exclude directories make it pretty flexible if you have the need. For most people, one or two exclude folders might be all that is needed, if at all. If you have enough RAM, just let it scan and cache everything. My "data" folder holds a directory with a backup of an old windows system and has at least several hundred thousand files and folders under it. I always exclude it, as it is never needed by my media players in their listing of movies. If you add /boot/cache_dirs -w to your "go" script, it will run each time you re-start your server. To stop cache_dirs from running, type cache_dirs -q To see all the options, type cache_dirs -h To run it in the foreground, so you can see what it is doing, use the -F option. As it loops and scans it will print statistics on how long each scan is taking. It will adjust the scan rate based on the activity on the server. You can set the min and max delay times of the scan rate using the -m min-time and -M max-time options. Usage: cache_dirs [-m min_seconds] [-M max_seconds] [-F] [-d maxdepth] [-c command] [-a args] [-e exclude_dir] [-i include_dir] [-w] cache_dirs -V = print program version cache_dirs -q cache_dirs -l on = turn on logging to /var/log/cache_dirs.log cache_dirs -l off = turn off logging to /var/log/cache_dirs.log -w = wait for array to come online before start of cache scan of directories -m NN = minimum seconds to wait between directory scans (default=1) -M NN = maximum seconds to wait between directory scans (default=10) -F = do NOT run in background, run in Foreground and print statistics as it loops and scans -v = when used with -F, verbose statistics are printed as directories are scanned -s = shorter-log - print count of directories scanned to syslog instead of their names -d NN = use "find -maxdepth NN" instead of "find -maxdepth 999" -c command = use command instead of "find" (command should be quoted if it has embedded spaces) -a args = append args to command -u = also scan /mnt/user (scan user shares) -e exclude_dir (may be repeated as many times as desired) -i include_dir (may be repeated as many times as desired) -p NN = set cache_pressure to NN (by default it is set to 10) -B = do not force disks busy (to prevent unmounted disks showing as unformatted) -S = do not suspend scan during 'mover' process -z = concise log (log run criteria on one line) -q = terminate any background instance of cache_dirs cache_dirs will force all the data disks to be "busy" to prevent them from being un-mounted. This will prevent un-mounted disks appearing as un-formatted in the unRAID management console. If you are using any release prior to 4.5beta7, this will prevent you from "Stopping" the array the first time you press the "Stop" button. Simply wait a few seconds and then press "Stop" a second time within 2 minutes of the first attempt to stop the array. If you have no other processes keeping disks busy, it will then stop. On release 4.5b7, it is no longer necessary to press stop a second time, and in fact you cannot, as the management console will show "Unmounting" until all processes holding disks busy are terminated and only the "Refresh" button is active. If you are on 4.5b7 or greater, if you wish, you can use the -B option to not force the disks to be busy. The 1.6.4 version of cache_dirs is attached. It is now coded to sleep while the "mover" process moves files from your cache drive. # Version 1.6.4 - Modified to suspend scan during time "mover" script is running to prevent # DuplicateFile messages from occurring as file is being copied. # - Added -S option to NOT suspend scan during mover process. # - Added logic to re-invoke cache_dirs if array is stopped and then re-started # by submitting command string to "at" to re-invoke in a minute. # - Added entry to "usage()" function for -B # Version 1.6.5 - Fixed what I broke in looking for "mover" pid to suspend during the "mover" # to eliminate warnings in syslog about duplicate files detected while files were # being copied. # Version 1.6.6 - Fixed typo in looking for mover-pid. # Version 1.6.7 - Added cache_pressure to "usage" statement, fixed bug where it reverted to 10 after being invoked through "at" # when used with the -w option. # Version 1.6.8 - Added -U NNNNN option to set ulimit, and detection of 64 bit OS so odds are this new option will not be needed. # by default, ulimit is set to 5000 on 32 bit OS, and 30000 on 64 bit OS. Either can be over-ridden with -U NNNNN on command line # Version 1.6.9 - Removed exec of /bin/bash. Newer bash was not setting SHELL variable causing infinite loop if invoked from "go" script. # Changed default ulimit on 64 bit systems to 50000. # by default, ulimit is now set to 5000 on 32 bit OS, and 50000 on 64 bit OS. Either can be over-ridden with -U NNNNN on command line # Setting ulimit to zero ( with "-U 0" option) is now special, cache_dirs will not set any ulimit at all. You'll inherit the system value, whatever it might be. The full revision history is as follows: #################################################################################### # cache_dirs # A utility to attempt to keep directory entries in the linux # buffer cache to allow disks to spin down and no need to spin-up # simply to get a directory listing on an unRAID server. # # Version 1.0 Initial proof of concept using "ls -R" # Version 1.1 Working version, using "ls -R" or "find -maxdepth" # Version 1.2 Able to be used with or without presence of user-shares. # Removed "ls -R" as it was too easy to run out of ram. (ask me how I know) # Added -i include_dir to explicitly state cached directories # Added -v option, verbose statistics when run in foreground # Added -q option, to easily terminate a process run in the background # Added logging of command line parameters to syslog # Version 1.3 Added -w option, to wait till array comes online before starting scan # of /mnt/disk* share folders. # Changed min-seconds delay between scans to 1 instead of 0. # Moved test of include/exclude directories to after array is on-line # Added logging of mis-spelled/missing include/exclude dirs to syslog # Added ability to have shell wildcard expansion in include/exclude names # Version 1.4 Fix bug with argument order passed to find when using -d option # Fixed command submitted to "at" to use full path. Should not need to # set PATH variable in "go" script. # Added ability to also cache scan /mnt/user with -u option # Version 1.4.1 Fixed version comment so it is actually a comment. # Version 1.5 Added -V to print version number. # Added explicit cache of root directories on disks and cache drive # Modified "average" scan time statistic to be weighted average with a window # of recent samples. # Added -a args option to allow entry of args to commands after dir/file name # example: cache_dirs -a "-ls" -d 3 # This will execute "find disk/share -ls -maxdepth 3" # Version 1.6 - Fixed bug... if -q was used, and cache_dirs not currently running, # it started running in error. OOps... Added the missing "exit" # - Changed vfs_cache_pressure setting to be 1 instead of 0 by default. # - Added "-p cache_pressure" to allow experimentation with vfs_cache_pressure values # (If not specified, default value of 1 will be used) # - Made -noleaf the default behavior for the "find" command (use -a "" to disable). # - Added logic to force all disks "busy" by starting a process with each as their # current working directory. This will prevent a user from seeing a frightening # Unformatted description if they attempt to stop the array. A second "Stop" will # succeed (the scan is paused for 2 minutes, so it may be stopped cleanly) # - Added new -B option to revert to the old behaviour and not force disks busy if by # chance this new feature causes problems for some users. # - Allow min seconds to be equal to max seconds in loop delay range. # - Added run-time-logging, log name = /var/log/cache_dirs.log # Version 1.6.1 - Fixed bug. Added missing /mnt/cache disk to scanned directories # Version 1.6.2 - Added trap to clean up processes after kill signal when run in background # Version 1.6.3 - Modified to deal with new un-mounting message in syslog in 4.5b7 to # allow array shutdown to occur cleanly. # Version 1.6.4 - Modified to suspend scan during time "mover" script is running to prevent # DuplicateFile messages from occurring as file is being copied. # - Added -S option to NOT suspend scan during mover process. # - Added logic to re-invoke cache_dirs if array is stopped and then re-started # by submitting command string to "at" to re-invoke in a minute. # - Added entry to "usage()" function for -B # Version 1.6.5 - Fixed what I broke in looking for "mover" pid to suspend during the "mover" # to eliminate warnings in syslog about duplicate files detected while files were # being copied. # Version 1.6.6 - Fixed mover-detection to use the exact same logic as "mover" (and fixed stupid typo I had made) # Version 1.6.7 - Added cache_pressure to "usage" statement, fixed bug where it reverted to 10 after being invoked through "at" # when used with the -w option. Joe L. cache_dirs.zip1 point
-
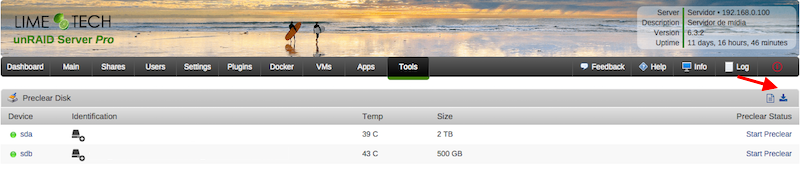
Hi guys, this is a simple plugin that allows users to clear their disks before add them to the array. The main characteristics of this plugin are: Modularity: can be used standalone or in conjunction with Joe L. or bjp999 scripts; Ease of use: with a few clicks you can start a clear session on your disk; Integration: you can always access the plugin under Tools > Preclear Disk menu. If you have Unassigned Devices installed, you can start/stop/view preclear sessions directly from Main > Unassigned Devices. All dependencies included: you don't need SCREEN to run a preclear session in the background; all jobs are executed in the background by default, so you can close your browser while the preclear runs. You can install it directly or via Community Apps. Q & A: Q) Why Joe L. or bjp999 scripts are not included? A) I'm not authorized by Joe L. to redistribute his script, so you need to download a copy from the topic above and put it under /boot/config/plugins/preclear.disk/ renaming it to preclear_disk.sh if necessary. bjp999 modifications are unofficial, so I decided not to include it by default. A) the bjp999 script is now included by default. Q) By default, I see a "gfjardim" script always available. Why? A) Since I'm not authorized to redistribute Joe L. script and the recent slow support by the author, I decided a major code rewrite in the script was needed. The new script is being actively supported, compatible with unRAID notifications, is faster than bjp999 script and has a cleaner output so users can easily visualizes what's going on with their disks. Q) I want to use one of the older scripts(Joe L. or bjp999) in conjunction with notifications. Is that possible? A) Yes. I've made some adjustments on both scripts so they become compatible with unRAID notifications; Joe L. version can be found here and bjp999 can be found here. A) the bjp999 script is now included by default; it includes support for Unraid notifications. Q) Is there any howtos available? A) gridrunner made a awesome video explaining why preclearig a hard disk is a good idea, and how you can accomplish that: Q) The plugin asked me to send some statistics information. How does the statistics report system work? Is it safe? Is it anonymous? A) To better track the usage of the plugin, a statistics report system was put in place. The main goals I intend to archive are: know number of disks that gets precleared; fix any silent bugs that gets reported on the logs; know average size of disks, their model, their average speed and elapsed time we should expect from that model; success rate; rate of disks with SMART problems; This system is totally optional and users will get prompted if they want to send each report. It is also safe and totally anonymous, since all data is sent to Google Forms and no identifying data is exported, like disks serial numbers. Detailed info can be found here. The statistics are public and can be found here. Q) How can I download a copy of the plugin log? A) Please go to Tools, then Pleclear Disk, and click on the Download icon: Q) Which are the differences between Erase and Clear? A) The Clear option uses zeroes to fill the drive; at the end, the drive can be added to the array the array immediately. The Erase All the Disk option uses random data to wipe out the drive; the resulting drive can't be quickly added to the array. If you want to add if after erase, you must select Erase and Clear the Disk. Troubleshooting: Q) After Zeroing the disk, the Post-Read operation fails saying my drive isn't zeroed. A) When zeroing the disk, the script uses a zero filled data stream produced by the pseudo-device /dev/zero. If a Post-Read fails just after a Zeroing operation, chances are that you have bad RAM memory, or less frequently bad PSU, bad cables or bad SAS/SATA card. Please run some rounds of MEMTEST on your machine to test your RAM modules. Q) A Pre-Read operation failed and I see Pending Sectors on the SMART report. A) Pending Sectors will lead to read errors, and the Pre-Read operation will fail. To force the hard drive firmware to remap those sectors, you have to run a Preclear session with the Skip Pre-Read option checked. Q) I've lost communication with the webgui, can I manage preclear sessions from the terminal? A) Yes, you can. If you lost communication with the webgui or want to use the command line interface to manage your preclear sessions, you just need to type preclear on your terminal to start/stop or observe a preclear session.
 1 point
 -
NEW! For Unraid 6.x, this utility is named: unraid6x-tunables-tester.sh For Unraid 5.x, this utility is named: unraid-tunables-tester.sh The current version is 4.1 for Unraid 6.x and is attached at the bottom of this post. I will maintain this post with future versions (if there are any). The legacy version 2.2 for Unraid 5.x is attached at the bottom of this post. This version is no longer maintained. VERSION HISTORY # V4.1: Added a function to use the first result with 99.8% max speed for Pass 2 # Fixed Server Name in Notification messages (was hardcoded TOWER) # Many fixes to the SCSI Host Controllers and Connected Drives report # Added a function to check lsscsi version and optionally upgrade to v0.30 # Added a function to archive unprocessed Notifications # Updated report to show RAM usage in KB if below 0.5 MB # Cosmetic menu tweaks - by Pauven 08/14/2019 # # V4.0: Updated to work with Unraid 6.6.x and newer # No longer compatible with Unraid 5.x servers (still supported by UTT v2.2) # Changed /root/mdcmd to just mdcmd # Added an Unraid version check and compatibility warnings # Added a Unraid Mover warning if Mover has file moves queued # Removed md_write_limit # Added new tests for md_sync_thresh and nr_requests # Updated logic to handle dual parity servers # Refined test points and test running time # Added new logic to only test low, higher or ultra high points if necessary # Added a staggered spin-up of any sleeping array drives before running tests # Added lots of new server info to the output file # Added RAM consumption of md_num_stripes info on every test point # Added a separate CSV file for charting the results # Added Baseline test to measure performance of current configuration # Added Default tests to measure performance of stock Unraid values # Replaced B4B with new Thriftiest - all new algorithm 95% of fastest speed # Added a new Recommended Sync Speed at 99% of fastest speed # Removed Read/Write tests - not compatible w/ Unraid v6 # Menu polishing, code cleanup and bug fixes # Reformated report output and added system info to reports # Added an Unraid Notifications script wrapper to block notifications # Added a trap to handle script aborting to run cleanup routines - by Pauven 08/05/2019 # # V3.0: Internal version only, never publicly released # Added download/install/usage of lshw for hd info # Added a write test for checking md_write_limit values # Added a read test for checking md_num_stripe values - by Pauven 09/06/2013 # # V2.2: Added support for md_sync_window values down to 8 bytes, # Added a extra-low value special pass to FULLAUTO, # Fixed a bug that didn't restore values after testing - by Pauven 08/28/2013 # V2.1: Added support for md_sync_window values down to 128 bytes, # Fixed a typo on the FULLAUTO option - by Pauven 08/28/2013 # V2.0: Changed the test method from a "time to process bytes" to a "bytes # processed in time" algorithm, lowering CPU utilization during testing, # Updated menus to reflect time based options instead of % options, # Revamped FULLAUTO with an optimized 2-hour 2-pass process, # Added Best Bang for the Buck sizing recommendation, # Added logic to autocancel Parity Checks in progress, # Added a check to make sure the array is Started - by Pauven 08/25/2013 # v1.1: Increased update frequency 1000x to improve result accuracy, # Polished the formatting of the output data, # Various menu improvements and minor logic tweaks, # Added menu options for Manual Start/End Overrides, # Updated logic for identifying the best result, # Extended the range of the FULLAUTO test to 2944, # Added a memory use calculation to the report, # Added option to write new params to disk.cfg - by Pauven 08/23/2013 # v1.0: Initial Version - by Pauven 08/21/2013 EXECUTIVE SUMMARY Unraid Tunables Tester (UTT) is a utility that runs dozens of partial, non-correcting parity checks with different values for the Unraid Tunable parameters and reports on the relative performance for each set of values. Adjusting these values can improve system performance, particularly Parity Check speed, and this utility helps you find the right values for your system. On the new UTT v4.1 for Unraid v6.x, users can select from predefined Normal, Thorough, Long, and Xtra-Long tests. There are no manual controls. This version tests md_sync_window, md_num_stripes, md_sync_thresh, and optionally nr_requests (in the Thorough and Xtra-Long tests). On the legacy UTT v2.2 for Unraid v5.x, users can either manually select the test value ranges and test types, or alternatively choose a Fully Automatic mode that runs an algorithm designed to zero in on the best values for your system. This version tests Unraid Tunables md_sync_window, md_write_limit, and md_num_stripes. Users don't need to know any command line parameters, as all prompts are provided at runtime with friendly guidance and some safety checks. SUMMARY Since Unraid servers can be built in a limitless number of configurations, it is impossible for Lime-Technology to know what tunable parameters are correct for each system. Different amounts of memory and various hardware components (especially HDD controllers and the drives themselves) directly affect what values work best for your system. To play it safe, Lime-Technology delivers Unraid with 'safe' stock values that should work with any system, including servers with limited RAM. But how is a user to know what values to use on their server? This utility addresses that problem by testing the available tunable parameters: UTT v4.1 for Unraid 6.x UTT v2.2 for Unraid 5.x md_num_stripes md_num_stripes md_sync_window md_sync_window md_sync_thresh md_write_limit nr_requests Each test is performed by automatically setting the values and running a partial, Non-Correcting Parity Check, typically less than 1% of a full Parity Check. By running just a short section of a Parity Check before stopping it, this utility can test multiple values in relatively quick succession (certainly quicker than running a full Parity Check or doing this process manually). Depending upon the test chosen, the UTT script will try dozens or even hundreds of combinations of values, finding the combination that works best for your particular server hardware. There are no command line parameters, the entire utility is driven through a user prompt system. Each test is timed down to the millisecond, which is important when running shorter tests, so you can determine which set of values are appropriate for your system. NOTES on the New UTT v4.1 for Unraid 6.x For the new UTT v4.1, the output is saved to the current directory when you launch UTT. The report will be named based upon the test type you chose (i.e. NormalSyncTestReport_<datestamp>.txt). There is also an identically named CSV file generated that has all of the test results in spreadsheet format, making for easier charting of results. When the tests complete, you are provided the option to apply the Fastest, Thriftiest, or Recommended values that were discovered, or revert back to the previous values. In addition, if you apply new values, you are also given the option to SAVE the chosen values to the server's configuration, so it will re-apply after reboot. You can also manually apply your chosen values later by going to Settings > Disk Settings. The Fastest values represent the combination of Tunables that resulted in the fastest measured Parity Check speeds. If the fastest speed was observed in multiple combinations of values, then the combination that has the lowest memory utilization is chosen as the fastest. The Recommended values are the combination of values with the lowest memory utilization that achieves at least 99% of the Fastest speed. Often this provides a nice memory savings over the Fastest values, while only adding a few seconds or minutes to a full Parity Check. The Thriftiest values are the combination of values with the lowest memory utilization that achieves at least 95% of the Fastest speed. These usually provide a significant memory savings over the Fastest values, but might make your Parity Checks noticably longer. In case you're wondering, the formula for assigning the four Tunables values is of my own design. It tests a whole bunch of values for md_sync_window, assigns md_num_stripes as 2x md_sync_window, and tests various methods of assigning md_sync_thresh (md_sync_window -1, -4, -8, -12, -16, -20, -24, -28, -32, -36, -40, -44, -48, -52, -56, -60, -64, and md_sync_window/2) and optionally various values for nr_requests (128, 16, and 8). If nr_requests is not tested, then all tests use nr_requests=128, which typically provides both the fastest speeds and the most obvious speed curves, making it easier to find the best values for the other three Tunables. It should be noted that low values for nr_requests (i.e. nr_requests=8 ) seems to make all values for the other Tunables perform really well, perhaps 90-95% of maximum possible speeds, but in our testing we have always found that the maximum possible speeds come from nr_requests=128. For this reason, all of the default tests are performed at nr_requests=128, and we make the nr_requests tests optional (Through or Xtra-Long tests). In our experience, after the other values have been properly tuned for your server, these optional nr_request tests of lower values will only show slower speeds. That said, it is possible that your server hardware responds differently, and the only way to know for sure is to run these optional tests. NOTES on the Legacy UTT v2.2 for Unraid 5.x For the legacy UTT v2.2, regardless of what type of tests your run, the output is saved to a file named TunablesReport.txt, which lives in the same directory you install the utility. No CSV is generated for this version. While this utility tests changes to all three tunable parameters, these changes are not permanent. If you wish to make the settings permanent, you have to chose your preferred values from the report, and manually enter them on the Settings > Disk Settings menu page in unRAID. Additionally, after the tests are completed, the utility sets the tunable values back to unRAID stock values (for safety, in case you forget about setting them). A reboot will return you to your previously selected values, as will hitting Apply on the Settings > Disk Settings menu page. In case you're wondering, the formula for assigning the three values is of my own design. It assigns md_num_stripes as approximately 11% bigger than md_write_limit + md_sync_window, rounded to the nearest testing interval. md_write_limit is also set to the same value as md_sync_window for all values beyond 768 bytes. Based upon your test parameters (primarily the Interval setting), the md_num_stripes value will calculate differently. As far as I am aware my logic works okay, but this may have to be revisited in the future if new understandings are gained on how these three values correlate. There are no published hard and fast rules for how to set the three values together. OBLIGATORY WARNINGS Yup, here's my CYA prose, but since it is for your benefit, I suggest you read it. Outside of writing the results report file (most likely to your flash drive), this utility does not do any writing to the server. The Parity Checks are all performed in a read-only, non-correcting fashion. But that doesn't mean something can't go horribly wrong. For one, simply using this utility may stress your server to the breaking point. Weak hardware may meet an early demise. All array drives will be spinning simultaneously (smaller drives won't spin down like a normal Parity Check permits) and heat will build up in your system. Ensure you have good cooling. Running these tests, especially Fully Automatic, may be harder on your system than a full Parity Check. You have to decide for yourself which tests are appropriate for your server and your comfort level. If you are unsure, the default values are a pretty safe way to go. And if you decide after starting a test that you want to abort it, just hit CTRL-C on your keyboard. If you do this, the Parity Check will most likely still be running, but you can Cancel it through the GUI. (Note, the new UTT v4 has built-in functionality to stop any running Parity Checks and to restore original values if you perform a CTRL-C and abort the test. Yay!!!) Another issue that can crop is is out of memory errors. The three Unraid Tunable values are directly related to memory allocation to the md subsystem. Some users have reported Kernel OOPS and Out Of Memory conditions when adjusting the Unraid Tunables, though it seems these users are often running many add-ons and plug-ins that compete for memory. This utility is capable of pushing memory utilization extremely high, especially in Fully Automatic mode, which scans a very large range of assignable values beyond what you may rationally consider assigning. Typically, running out of memory is not a fatal event as long as you are not writing to your array. If you are writing to your array when a memory error occurs, data loss may occur! The best advice is to not use your server at all during the test, and to disable 3rd party scripts, plug-ins, add-ons and yes even GUI/menu replacements - something made easier with unRAID's new Safe Boot feature. On Unraid 6.x, it is also important to stop any VM's and Dockers. One last caution: If you have less than 4GB of RAM, this utility may not be for you. That goes doubly if you are running a barebones, lightweight 512MB server, which should probably stay at the default Tunable values. This utility was designed and tested on a server with 4GB, and ran there without any issues, but you may run out of memory faster and easier if you have less memory to start with. NEW UTT V4.1 INSTALLATION Installation is simple. Download the file unraid6x-tunables-tester.sh.v4_1.txt (current version at the bottom of this post) Rename the file to remove the .v4_1.txt extension - name should be unraid6x-tunables-tester.sh Create a new folder for the script, for example \\<servername>\flash\utt (or /boot/utt from the Unraid console) Copy the file to the folder you created Check to see if the file is executable by running ls -l in the install directory: -rwxrwxrwx 1 root root 21599 2013-08-22 12:54 unraid6x-tunables-tester.sh* If you don't see -rwxrwxrwx (for Read Write Execute) use command chmod 777 unraid6x-tunables-tester.sh to make it executable LEGACY UTT V2.2 INSTALLATION Installation is simple. Download the file unraid-tunables-tester.sh.v2_2.txt (current version at the bottom of this post) Rename the file to remove the .v2_2.txt extension - name should be unraid-tunables-tester.sh Copy the file onto your flash drive (I put it in the root of the flash for convenience) Check to see if the file is executable by running ls -l in the install directory: -rwxrwxrwx 1 root root 21599 2013-08-22 12:54 unraid-tunables-tester.sh* If you don't see -rwxrwxrwx (for Read Write Execute) use command chmod 777 unraid-tunables-tester.sh to make it executable RUNNING THE UTILITY The utility is run from the server's console, and is not accessible from the unRAID GUI. I like to use PuTTY or TELNET , plus SCREEN to manage my console connections, but use whatever you like best. You should always run this utility interactively. It is not designed to be something you put in your go file or in a cron job. To run, simply cd to the folder you placed the file (i.e. cd /boot/utt) then run the program (i.e. type: unraid6x-tunables-tester.sh, or ./unraid6x-tunables-tester.sh for those that like that convention). For the new UTT v4.1, remember that the name has 6x in it, unraid6x-tunables-tester.sh, while the legacy UTT v2.2 is just unraid-tunables-tester.sh Edited 08/22/2013 - Added chmod instructions Edited 08/23/2013 - Updated to version 1.1 Edited 08/26/2013 - Updated to version 2.0 Edited 08/28/2013 - Updated to version 2.1 Edited 08/28/2013 - Updated to version 2.2 Edited 08/05/2019 - Added new version 4.0 for Unraid 6.x Edited 08/14/2019 - Updated to version 4.1 for Unraid 6.x CONTINUED IN NEXT POST... Download legacy UTT v2.2 for Unraid 5.x: unraid-tunables-tester.sh.v2_2.txt Download the new UTT v4.1 for Unraid 6.x: unraid6x-tunables-tester.sh.v4_1.txt1 point
-
How to setup Dockers to have own IP address without sharing the host IP address: This is only valid in unRAID 6.3 series going forward. 6.4.0 has this built into the GUI but currently have a limitation of needing extra IP addresses for each of your interfaces and needs to delete all manually created docker networks. If you don't like that, you can opt to create the network manually like here and disable the docker network auto cleanup. 6.4.1 is now more intelligent about this and presents a relatively powerful UI that covers most simple cases. You don't need to assign unnecessary IP address to additional interfaces anymore. refer to https://lime-technology.com/forums/topic/62107-network-isolation-in-unraid-64/ for more details Single NIC only: Some assumptions: We'll be using a shared interface br0 (This allows us to use the same nic with virtual machines, otherwise its alright to use eth0) The IP address details are: unRAID = 192.168.1.2 Gateway/router = 192.168.1.1 Subnet = 192.168.1.0/24 Docker IP pool = 192.168.1.128/25 (192.168.1.128-254) A new docker network will be established called homenet Login via SSH and execute this: # docker network create \ -o parent=br0 \ --driver macvlan \ --subnet 192.168.1.0/24 \ --ip-range 192.168.1.128/25 \ --gateway 192.168.1.1 \ homenet Modify any Docker via the WebUI in Advanced mode Set Network to None Remove any port mappings Fill in the Extra Parameters with: --network homenet Apply and start the docker The docker is assigned an IP from the pool 192.168.1.128 - 192.168.1.254; typically the first docker gets the first IP address # docker inspect container | grep IPAddress "SecondaryIPAddresses": null, "IPAddress": "", "IPAddress": "192.168.1.128", # docker exec container ping www.google.com PING www.google.com (122.2.129.167): 56 data bytes 64 bytes from 122.2.129.167: seq=0 ttl=57 time=36.842 ms 64 bytes from 122.2.129.167: seq=1 ttl=57 time=36.496 ms ^C # docker exec container ping 192.168.1.2 PING 192.168.1.2 (192.168.1.2): 56 data bytes ^C # At this point, your gateway/router will have a first class network citizen with the specified IP address An additional Extra Parameter can be specified to fix the IP address: --ip 192.168.1.128 The container will not be allowed to talk to unRAID host due to the underlying security implementation with the macvlan driver used by Docker. This is by design That's it. Secondary NIC is available: Some assumptions: We'll be using a dedicated interface br1 (the native eth1 interface can used here too) There is no IP address assigned to the interface The IP address details are: Gateway/router = 10.0.3.1 Subnet = 10.0.3.0/24 Docker IP pool = 10.0.3.128/25 (10.0.3.128-254) A new docker network will be established called docker1 unRAID has an ip of 10.0.3.2 Login via SSH and execute this: # docker network create \ -o parent=br1 \ --driver macvlan \ --subnet 10.0.3.0/24 \ --ip-range 10.0.3.128/25 \ --gateway 10.0.3.1 \ docker1 Modify any Docker via the WebUI in Advanced mode Set Network to None Remove any port mappings Fill in the Extra Parameters with: --network docker1 Apply and start the docker The docker is assigned an IP from the pool 10.0.3.128 - 10.0.3.254; typically the first docker gets the first IP address # docker inspect container | grep IPAddress "SecondaryIPAddresses": null, "IPAddress": "", "IPAddress": "10.0.3.128", # docker exec container ping www.google.com PING www.google.com (122.2.129.167): 56 data bytes 64 bytes from 122.2.129.167: seq=0 ttl=57 time=36.842 ms 64 bytes from 122.2.129.167: seq=1 ttl=57 time=36.496 ms ^C # docker exec container ping 10.0.3.2 PING 10.0.3.2 (10.0.3.2): 56 data bytes 64 bytes from 10.0.3.2: seq=0 ttl=64 time=0.102 ms 64 bytes from 10.0.3.2: seq=1 ttl=64 time=0.075 ms 64 bytes from 10.0.3.2: seq=2 ttl=64 time=0.065 ms 64 bytes from 10.0.3.2: seq=3 ttl=64 time=0.069 ms ^C --- 10.0.3.2 ping statistics --- 4 packets transmitted, 4 packets received, 0% packet loss round-trip min/avg/max = 0.065/0.077/0.102 ms At this point, your gateway/router will have a first class network citizen with the specified IP address An additional Extra Parameter can be specified to fix the IP address: --ip 10.0.3.128 The container can happily talk to unRAID as the packets go out via br1 and talk to the host on br0 That's it. Some caveats: With only a single NIC, and no VLAN support on your network, it is impossible for the host unRAID to talk to the containers and vice versa; the macvlan driver specifically prohibits this. This situation prevents a reverse proxy docker from proxying unRAID, but will work with all other containers on the new docker network. We can only have one network defined per gateway. So if you already have docker network br0 on your main LAN (gateway 192.168.1.1), docker will not allow you to create another network referencing the same gateway. I cannot confirm yet what happens in the case of two or more NICs bridged/bonded together (but it should be the same as a single NIC) unRAID 6.4.0 We need to disable the docker network auto generation and cleanup if we want these settings to remain (until the auto cleanup is made more intelligent). The code below should be inserted into the go file before /usr/local/sbin/emhttp is started. The code below will disable docker network auto creation too, so it will behave like 6.3.5. It seems that the docker page will happily show any docker network you have defined, so you can just use them as normal and no longer need to set Extra Parameters. Again not needed with 6.4.1 going forward. # stop docker network creation and pruning sed -i -e '/# cleanup/,+3s/^/## /;s/^ custom_networks/## custom_networks/' /etc/rc.d/rc.docker
 1 point
 -
I have developed a way to do the post-read and verify step of preclear dramatically faster than the current method (more than twice as fast). Functionally it is the same. I am looking for some folks that are planning to do some preclears this weekend, optimally someone planning to preclear 2 identical drives so we get a speed comparison. Drop me a PM if interested. Hoping to get 2-3 volunteers. I will be preclearing a new 4T drive. I am on 32-bit 5.0.5 but hoping a 64-bit person running a 6.0 beta will help test it too, and help me resolve any incompatibility. I am out of town and not able to access my array, but will be able to send the enhanced Preclear Friday. Edit: This is the link to the latest version: http://www.mediafire.com/download/xu2cel2zkb7475q/FastPreclear_FIX.zip1 point
-
I can confirm, exact same symptoms here. Fresh install of firefox on IOS, 401 error, same on fqdn and IP. Never used FF on IOS before, so can't say when if ever it worked.1 point
-
@gfjardim, this (no need for screen any more) sounds like a good candidate for a Q & A, in your first post.1 point
-
Delete your trial key. Not sure there is any real issue in this case, but there have been cases where things got confused due to having more than one key on flash.1 point
-
Tools - Docker Safe New Permissions. If that icon isn't there, then install Fix Common Problems plugin then and it'll get there. Do not use the stock New Permissions tool if you have docker apps installed.1 point
-
Why not just make that share cache-no?1 point
-
A lot of people think so, but lets face it, couchpotato level isn't exactly setting the bar high....1 point
-
Hey BRiT and all the rest of the gang. Apologies for my absence. I had some health issues crop up unexpected back in September, and it took me out of commission for a while. Plus I've been pretty busy in the new year. I would like to resume work on the v4 script. I recall I had ideas back in September, getting ready to completely revamp the testing method. What I had coded just wasn't working right. Of course, half a year later, I don't recall what my ideas were. But fortunately, I have a habit of sharing my ideas in writing, so I think I can get back to where I was in September by re-reading my old posts. Hopefully my absence brought back fond memories of Tom disappearing for long periods of time between unRAID releases... Probably best I don't make any promises of dates just yet. It'll take me a while to get my bearings and remember how to code again. Once I get a good enough v4, I think it would be a great idea to get it into a git repository so the community can maintain it. None of ever know when life attacks. Even better, hopefully it can become a true plugin. -Paul1 point
-
I'm not sure but I think it could be useful to check the webui for the version also but that may be too "programmer"1 point
-
Another option would be to replace the M1015 with an LSI 9201-16i. It has 16 ports available instead of 8 so you would have the 4 more you need plus 4 extra. But that is also expensive. I bought mine for about $384 (If I remember correctly) off of Amazon. Your Marvel 9230 based controller is a candidate for using a port multiplier but with my EP2C602-4L/D16 I found wouldn't work reliably for me with unRAID - why I bought the 9201 and replaced a M1015. You might have better luck then I did with the Marvel controller. I was passing it (9230 Marvel) through to a WHSv1 VM and every 3+ weeks it would drop the drives (same problem I had with my port multipliers on an earlier server). I needed VT-d so I couldn't turn that off and I have the latest bios installed already and adding iommu=pt had no effect which are three of the recommendations in this thread for it:1 point
-
Up and running. Went to flash/config and deleted the docker.cfg manually. Rebooted unraid, created a new image and it is running now. I am adding back my old containers now. Thank you all for your help.1 point
-
The new version of unMENU now has the ability to use .css skins. Its appearance has been updated thanks to the work of some very talented unMENU users, and one specifically ( mvzdwaan ) who took on the task of adding the ability to read style sheets. Major change 1. New .css skinning capability and two new skins in addition to the "Classic" skin. (need to thank mvzdwaan for his .css skills) 2. Three new buttons on user-scripts page to change between skins. Minor changes in a few commands 1. On System-Info screen, "Memory Info" presents output of "free -l" instead of "free" 2. On System-Info screen, "Open Files" presents output of "lsof" instead of "lsof /dev/md*" 3. On Network and Disk performance screens, formatting fixed to deal with higher performance data rates. 4. On syslog view, newer definition file to prevent "sas: ata[0-9].*dev error handler" from being marked as an error. 5. On syslog view, newer definition added to prevent media file name in syslog with "*terror" in name from being flagged as an error. 6. PERL package has option added to NOT load MP3 library every time it starts from CPAN If you already have unMENU installed, you may use the "check for updates" button on the 'User-Scripts' page to download the new version. You will have to Re-Start unMENU for the updates to take effect, so you'll want to also press the 'restart unMENU' button. If you do not have unMENU installed, follow the instructions on the google.code page here: http://code.google.com/p/unraid-unmenu/ A huge thanks to mvzdwaan for his skills in adding the capability to "skin" unMENU and vastly upgrade its appearance. In fact, there are three new user-script buttons to allow you to switch between unMENU classic, and new horizontal and vertical menu skinned formats. The currently used "skin" is in /boot/unmenu/images/stock/unmenu.css You may edit that file as you desire if you have css skills. The new skin is effective on all the screens EXCEPT the file-browser. It has not been upgraded as of this post. It works differently than the others so it will take a bit more effort. It will simply have the classic appearance for now. Have fun... To me, it looks really great for an "awk" script.... Joe L. This is the new unMENU 1.6 main screen with the "horizontal' skin: Joe L.1 point
-
myMain is a part of the unmenu package that can be installed HERE Sample screenshot with basic instructions. See below for additional instructions and links to solve common questions and issues: Please use this thread to ask questions. I will use this initial message to include helpful links to forum messages that will help with common issues. Please use this thread to ask questions. I will use this initial message to include helpful links to forum messages that will help with common issues. myMain Documentation Additional myMain Documentation - Gives more details on monitoring the syslog, generating smart reports, and using the smart view Monitoring preclears with myMain - Automatic feature - shows what it looks like. Diagnosing an HPA warning Suppressing an HPA warning Custom myServer and mySlot images Why does myMain speed show a slower speed that the running preclear script Simple example of adding a column to a view (need to click on the Detail view to follow this example)1 point
-
A utility to "burn-in" a new disk, before adding it to your array has been requested several times. Also requested is a process to "pre-clear" a hard disk before adding it to your array. When a special "signature" is detected, the lengthy "clearing" step otherwise performed by unRAID is skipped. This process is named: preclear_disk.sh It is attached to this post, look for the download link near the end of this first long post. The current version is 1.15. If you have an older version, please download the newest one. Older versions prior to 1.14 did not have the ability to properly handle larger disks. (larger than 2.2TB) Versions prior to 1.15 did not work properly on 64 Bit unRAID. If you are running unRAID 4.7 onward, in the absence of either a "-a" or "-A" option specified on the command line, preclear_disk.sh will use the alignment preference you specified in the unRAID settings screen as its default. (-a will force MBR-unaligned. -A will force MBR-4k-aligned ) (The link for the attachment is only visible after you log in as a user of this forum) Download it to your PC, un-zip it there, then copy preclear_disk.sh to your flash drive to the same folder that currently has bzroot and bzimage. On linux, that folder would be /boot From windows file-explorer,the folder would be at \\tower\flash if you just plug the flash drive into your windows PC, it will be the top level folder on the drive. Once a disk has been successfully pre-cleared, you can "quickly" add it to your array by following these steps: 1. Stop your array. 2. Either do a screen print, or make note of the disk assignments on the "Devices" page. (just for your own records) 3. Assign the pre-cleared disk to the array in a new, previously un-assigned slot or Assign the pre-cleared disk to the array in place of a smaller or failing disk. 4. Start the array by pressing "Start" (you may need to check the box under it to enable it when adding a drive) Note: If running an older 4.X version of unRAID, DO NOT press any button labeled "restore" as it will immediately invalidate parity and start an entirely new parity calc process leaving your data unprotected until it is complete. Always press "Start" 5. If the pre-cleared drive is being added to a new slot in the array, once the array is started you will be presented with a "Format" button. Press the format button and within 30 seconds or so a few minutes the new pre-cleared disk will have been formatted and added to your array. (disks are bigger now, so they take longer to format) 5a. If the drive is replacing an existing drive, the contents of the existing drive will be reconstructed onto the new drive when you press "Start" and no "Format" button will be present. This re-construction of contents will take many hours for a large disk (similar to the time it takes to do a full parity check). Do NOT use anything other than the Format button on the main unRAID management console page to format a pre-cleared disk. The "Format" button will appear after you start the array after assigning a pre-cleared drive. Do NOT format the drive on your own using a reiserfs linux command, or using a button in unMENU, if you do, the pre-clear will be invalid, and you may even fool unRAID into thinking it is cleared when it is not. This would let you think you have parity protection when you do not. How does it work? The script: 1. gets a SMART report 2. pre-reads the entire disk 3. writes zeros to the entire disk 4. sets the special signature recognized by unRAID 5. verifies the signature 6. post-reads the entire disk 7. optionally repeats the process for additional cycles (if you specified the "-c NN" option, where NN = a number from 1 to 20, default is to run 1 cycle) 8. gets a final SMART report 9. compares the SMART reports alerting you of differences. All the time it is working, it presents a status display of its progress. A very old 8 Gig Quantum Fireball I used in testing did 10 cycles in 4 hours. It read the drive at about 25MB/s. Most modern disks can be read at about 80MB/s. A single cycle on a 2TB drive may take over 30 hours. The process of "reading" the disk can be optionally skipped, but I recommend you do it with any new drive. It allows the SMART firmware on the drive to identify any bad sectors and mark them for re-allocation. The actual re-allocation takes place when the drive is cleared, and then a post-read lets it identify any remaining bad sectors. If you don't care about finding the errors up front, while it is easy to RMA a drive, or if you don't have the time to wait, use the "-n" option to skip the pre/post read steps. As I said, I recommend it always be done. When pre/post reading the disk, I intersperse reading the beginning block, random blocks of data, the linear set of blocks of the entire drive, and the last block on the device. I purposely keep the disk head moving a LOT more than if just reading each block in turn. This is to identify hardware that is marginal. If your disk or cables, or controller, or power supply cannot cope with constant activity... you probably want to know it before you assign the disk to a spot in your array. If you wish to perform more than one cycle of read/clear/read, then use the "-c count" option where you can specify a number between 1 and 20. Do note that if it takes 30 hours to do one cycle on a large disk, 20 will take 600... a bit over 24 days... try one cycle before you kick it off for 20. If you wish to test if a disk is already pre-cleared, you can use the "-t" option. It runs in a few seconds and will let you know if the pre-cleared signature is present. (The pre-clear signature varies based on the disk geometry and size... it is not as easy as you might initially think to generate it in a shell script.) You will either need to kick this preclear_disk.sh script off from the system console, or from a telnet session. You must leave the session open as it runs. (and it will typically run for many hours) You are protected from an inadvertent error of giving the wrong drive by several sanity checks. It will not pre-clear any drive assigned on your "Devices" page. It will not process any drive that is currently mounted. It must be an un-assigned drive physically connected to your array and otherwise accessible. To invoke this script you simply list the name of a disk you wish cleared as an argument to the command, as in this example: cd /boot preclear_disk.sh /dev/hdk (you will need to use the three letter device name for the disk being precleared. On SATA drives, this will be sda, sdb, sdc, etc... On IDE drives, or SATA drives in IDE emulation mode it will be hda, hdb, hdc, etc... Use preclear_disk.sh -l to list the disks on your server available to be cleared.) If on version 4.7 of unRAID and you are clearing an ADVANCED FORMAT drive that works best with a 4k alignment of its data, use the "-A" option as in preclear_disk.sh -A /dev/sda This will result in a starting sector of 64 for the resulting partition that will be used for unRAID's file system. This is NOT backwards compatible with any version of unRAID prior to 4.7. If you want a bit more help, simply type: preclear_disk.sh -? Prior to doing anything to read or write the disk, you will be asked to confirm it is the disk you wish to clear. You must answer "Yes" (Capital "Y" lower case "es") Here is the confirmation screen. Here is the status display as it is pre-reading a new 750 Gig Seagate drive in my array. Looks like I've got about an hour to go in this step. Here it is, 3 hours, 38 minutes into the process... It is on step 2 of 10 of clearing the drive. (the step where the bulk of the drive is zeroed) The script has cleared 48 GB of the 750 Gig. It looks like it is writing to the disk at 70MB/s. The status display here is updated every 10 seconds. 5 hours, 40 minutes into the process on this 750 Gig drive... The clearing process has cleared 534GB of the 750. It seems to have slowed a tiny bit as it works its way to the higher numbered cylinders on the disk. It is now writing about 66MB/s. Several hours have passed..., I got close... I had to re-start due to a hardware issue (bad power splitter) In any case, the status display at that point looked like this: Here is a screen-shot as it is in the post-read phase. (This screen-shot is while clearing the much smaller disk I've been using for my tests) Finally, here is a screen shot when the pre-clear is completed. Just a few warnings... 1. This utility is not supported by Tom at Lime-Technology, however he did supply me a code segment showing what was checked when looking for a pre-cleared signature on a disk. 2. It is possible for you to clear a disk you did not intend...(if you have multiple disks that have data installed in your server, but they are not assigned to your array, and you want to clear one, but not the other, and you give the wrong device, it will be the wrong disk cleared... If you do, sorry... I tried to protect you from yourself. Do be careful. It is possible to crash your server if your hardware is not up to it. I've been fighting a crash of that type in one of the slots on my array that turned out to be caused by an intermittent "Y" power splitter to that drive tray 1st Edit: attached version no longer dependent upon ncurses. (apparently, ncurses is not included in unRAID 4.4) 2nd Edit: I noticed that the 4.4final and 4.5beta releases of unRAID do not have a working "smartctl" command. To get it working you must install a missing library file it uses. If you do not, this script will still clear the drive, but the feature where it compares SMART reports from before and after the clearing process will not work. See this post for more details: http://lime-technology.com/forum/index.php?topic=2817.msg23548#msg23548 3rd Edit Dec 18, 2008, 4:44 PM EST: Modified the script to not abort the read phase if a "read-error" occurs. It will attempt to continue to read the remaining portion of the disk. 4th edit July 21, 2009. Version 0.9.3 -- Worked around the bug in "bash" that caused the script to stop at 88% on some disks. -- I also fixed a bug where I was improperly passing an argument to the "dd" commands intended to torture/exercise the disk by reading random blocks interspersed with the linear read of the entire disk. The good news is that they now work, the bad news is, they now work, and they will slow down the pre and post-read times processing times slightly (because they are working) -- Added new "mail" notification option as submitted by forum member jbuszkie. You must have a working "mail" command to use this. 5th edit: August 31, 2009. New version 0.9.6 (yes, 0.9.4 and 0.9.5 were internal versions as jbuszkie and I tested) Version .9.4 - Enable SMART monitoring, just in case it is disabled on a drive. Version .9.5 - Added disk temperature display and disk read speed display. Version .9.6 - Enhanced the mail reporting to include some statistics (time, MB/s temp .. ect) - Fixed a bug with using zero.txt and concurrent tests. Each test will use it's own file. - Changed read block size to be bigger than 1,000,000 if smaller, to improve read speed More instructions on how to install and run is in this post for those who might need more detail: It also describes how to run multiple preclear_disk.sh processes at the same time on multiple disks. Edit: Sept 25, 2009. Version .9.7 I made another improvement of the preclear script. it now validates that the disk is all zeros in the post-read phase. (Up until now, it just validated the pre-clear signature) This added check will add 10-15% to the time needed to clear a drive. It will be skipped if you use the -n option to not do any pre or post read. it will also be skipped with a new -N option, this will still do the normal pre-read and post-read. Edit: Oct 06, 2009. Version .9.8. Added options to set the read/write block size and block count for use by users with servers with limited RAM and resources. In general making the sizes smaller will result in a longer run time, but it will use less memory. New options are: -w size = write block size in bytes. If not specified, default is 2048k. -r size = read block size in bytes, default is one cylinder at a time ( heads * sectors * 512)) -b count = number of blocks to read at a time. If not specified, default is 200 blocks at a time. These new -w, -r, and -b options are described in this post: http://lime-technology.com/forum/index.php?topic=2817.msg39972#msg39972 Edit: Jan 14, 2011. Version .9.9 New options are: -A = force starting sector to be on sector 64 for 4k alignment. -l = list disks and affiliated devices that are potential for clearing. Makes it easier to identify correct device for new unRAID users. The listing of potential disks looks like this: [color=maroon]root@Tower:/boot# preclear_disk.sh -l ======================================== Disks not assigned to the unRAID array (potential candidates for clearing) ======================================== /dev/sdc = ata-Maxtor_6Y250P0_Y63KH45E /dev/hdj = ata-QUANTUM_FIREBALLlct15_08_611020017228[/color] New feature is a vastly simplified output report. It will take the place of the current "diff" of the beginning and end smart report. [b][color=maroon]** Changed attributes in files: /tmp/smart_start_sda /tmp/smart_finish_sda ATTRIBUTE NEW_VAL OLD_VAL FAILURE_THRESHOLD STATUS RAW_VALUE Raw_Read_Error_Rate = 111 119 6 ok 30377685 Spin_Retry_Count = 100 100 97 near_thresh 0 Unknown_Attribute = 99 100 99 FAILING_NOW 0 Airflow_Temperature_Cel = 72 73 45 ok 28 Hardware_ECC_Recovered = 57 29 0 ok 30377685 *** Failing SMART Attributes in /tmp/smart_finish_sda *** ID# ATTRIBUTE_NAME FLAG VALUE WORST THRESH TYPE UPDATED WHEN_FAILED RAW_VALUE 184 Unknown_Attribute 0x0032 099 099 099 Old_age Always FAILING_NOW 0 10 sectors were pending re-allocation before the start of the preclear. 5 sectors are pending re-allocation at the end of the preclear, a change of -5 in the number of sectors pending re-allocation. 1 sector had been re-allocated before the start of the preclear. 3 sectors are re-allocated at the end of the preclear, a change of 2 in the number of sectors re-allocated. [/color][/b] It only will print lines for attributes that change, or are failing, or where the new-value is within 25 of the failure threshold. It will not print lines where the initial value was 253, or 200, or 100, as those are frequently initialized values. New feature, the individual SMART reports are named after their affiliated disk device. They are also in /var/log/smart_start_sdX and /var/log/smart_finish_sdX so you can see them with your browser at: //tower/log/smart_start_sdX and //tower/smart_finish_sdX The pre and post SMART reports are saved in both the syslog and in individual files in the /tmp directory. Both will be erased when you reboot, so if you wish to view them, grab them before you reboot the server. Edit: Jan 15, 2011 .9.9a Improved output report based on user feedback. Edit: Jan 16, 2011 .9.9b Fixed report when using "-l" option to ignore new fields in dis.cfg when listing disks not in array. Additional minor changes in output report. Edit: Jan 16, 2011 .9.9c Fixed report when using "-l" option when used on 5.X version of unRAID with different "ls" date format. Additional improvements in output report. Edit: Jan 17, 2011 .9.9d Additional improvements in the output report to make it easier to read and understand. Edit: Jan 23, 2011 1.1 Added -C 63 option to quickly convert a precleared disk from a sector 64 to 63 start Added -C 64 option to quickly convert a precleared disk from a sector 63 to 64 start Added display of command line arguments to confirmation screen. Added display of preclear_script.sh version to display screen. Added -W option to skip "preread" and start with "write" of zeros to the drive. Added -V option to skip the "preread" and "clear" and only perform the post-read verify. Some improvement to make sure the logged results in the syslog are more complete. Edit: Jan 29, 2011 1.2 Fixed "-l" option to list drives even when there is no "ata-" entry in /dev/disk/by-id minor change to output report to eliminate report lines for smart values that are initializing. Edit: Feb 1, 2011 1.3 - Added logic to read desired "default" Partition Type from /boot/config. - Added logic to save dated copies of the final preclear and SMART reports to a "preclear_reports" subdirectory on the flash drive. - Added "-R" option to suppress the copy of final reports to a "preclear_reports" directory on the flash drive. (they are always in /tmp until you reboot) Edit: Feb 4, 2011 1.4 - Added "-D" option to suppress use of "-d ata" on smartctl commands Added "-d device_type" to allow use of alternate device_types as arguments to smartctl. Added "-z" option to zero the MBR and do nothing else. (remainder of the drive will not be cleared) Edit: Feb 8, 2011 1.5 - Added Model/Serial number of disk to output report. Fixed default argument to smartctl when "-d" and "-D" options not given. Added intermediate report of sectors pending re-allocation. Edit: Feb 8, 2011 1.6 - Fixed "-l" command and identification of assigned array disks when used on unRAID 5.0beta4 onward. Edit: Feb 28, 2011 1.7 - Fixed "-l" command and identification of assigned array disks when used on unRAID 5.0beta5 onward. Edit: March 13, 2011 1.8 - Changes to range of random blocks read to not read past last block on disk. Added confirmation prompt to continue even if smartctl returns an error return status Edit: March 19, 2011 1.9 - Fixed parse of default partition type and disk.cfg. Edit: additional version changes are described in the next post. (this post got too big to add additional content) preclear_disk.zip1 point